{article.name}
How to Attach a Patio Roof to an Existing House
A graceful integration may mean more work but improved functionality and aesthetics.

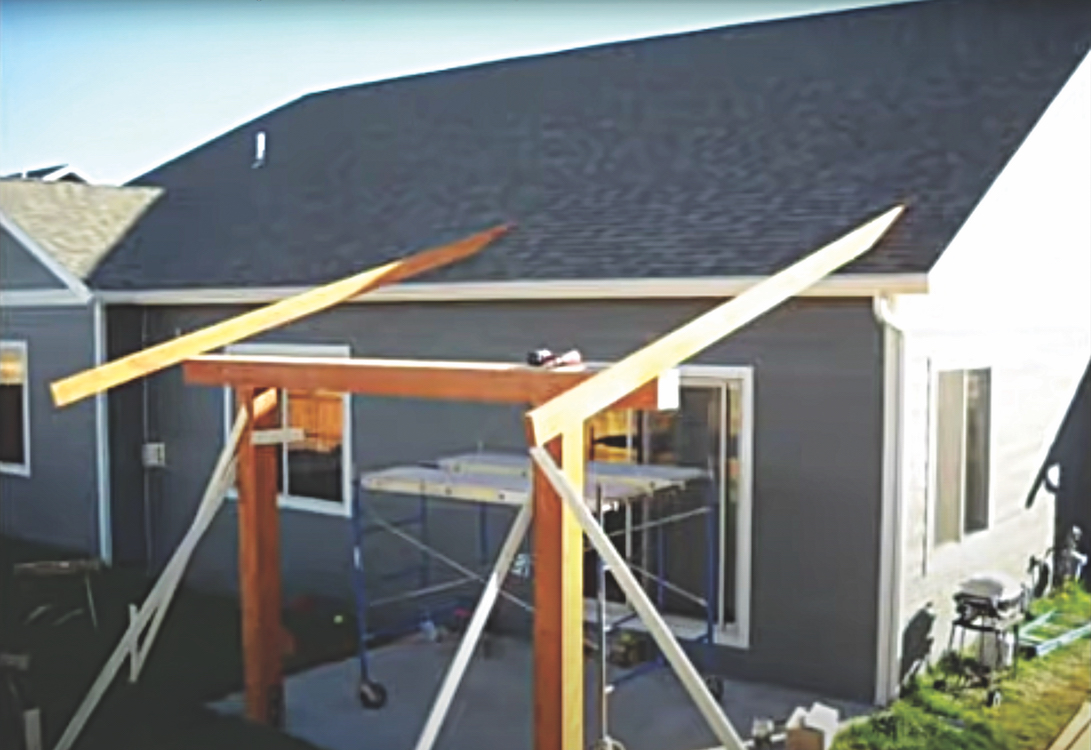
Abare, uncovered patio facing west will often feel exposed and uncomfortable, especially during sunny afternoons. That’s the case designer-builder Peter Brown faced at the Cook residence in Bozeman, Mont., and documented in his video, for which this article is derived. The homeowners asked Brown to design and build a roof for the exposed patio, which sits outside the dining room, so he set about considering the options.
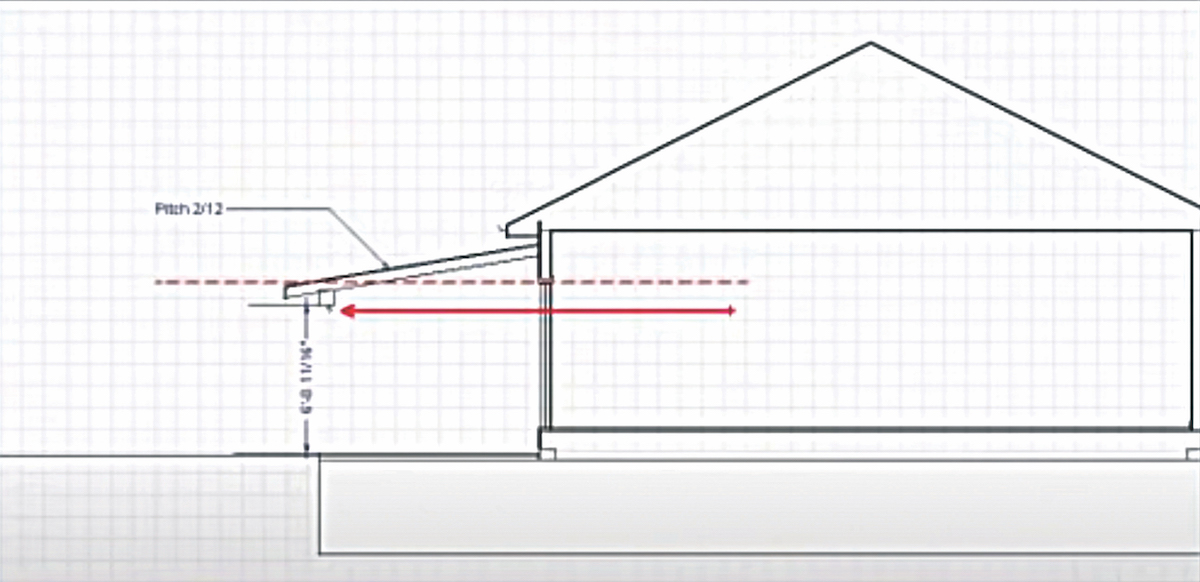
[1] With a ledger and a 2/12 roof pitch, the bottom edge of the new beam was about 6’10”, or about 16” lower than the upper edge of the patio door.
The Design Process
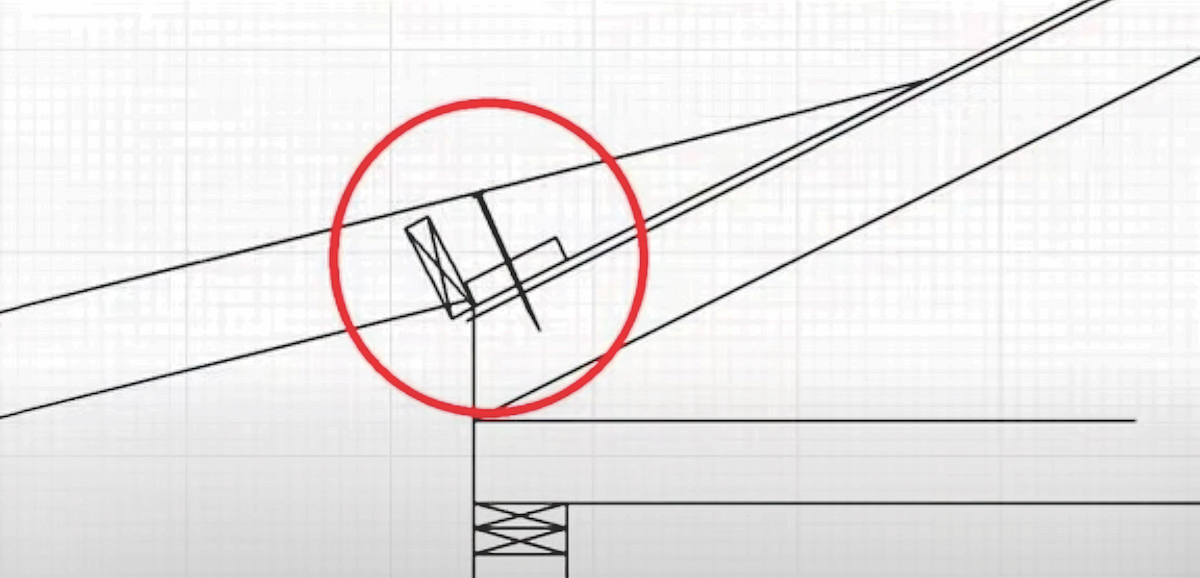
As the first and probably easiest option, Brown considered installing a ledger under the eave for a simple shed-roof structure. He determined that doing so would limit the sightlines from inside the house.
“A cross-section view of this option shows that the combination of a low ledger height, minimal roof slope, and the depth of the supporting beam will block the views from the dining area,” Brown explains. [1]
From exploring the options in the cross-section views, Brown determined that, “A better option will be to use the supporting post and beam structure but work backwards from a beam height that preserves the view.” [2]
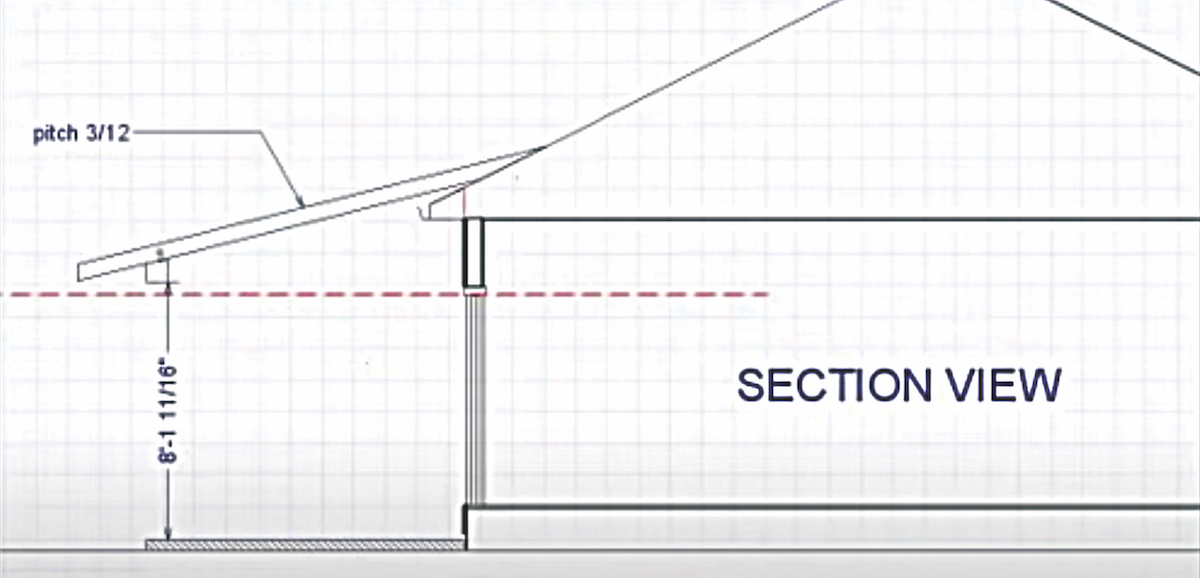
[2] Raising the beam and the patio roof preserves the view from the dining area.
“Again, this is illustrated in a cross-section view,” he says. “We first calculated a sight-line clearance height. Then going with a beam depth of 8 inches, a roof pitch of 3/12 and a 2x6 roof structure, we were able to determine the contact and bearing points of this new roof onto the existing roof.”
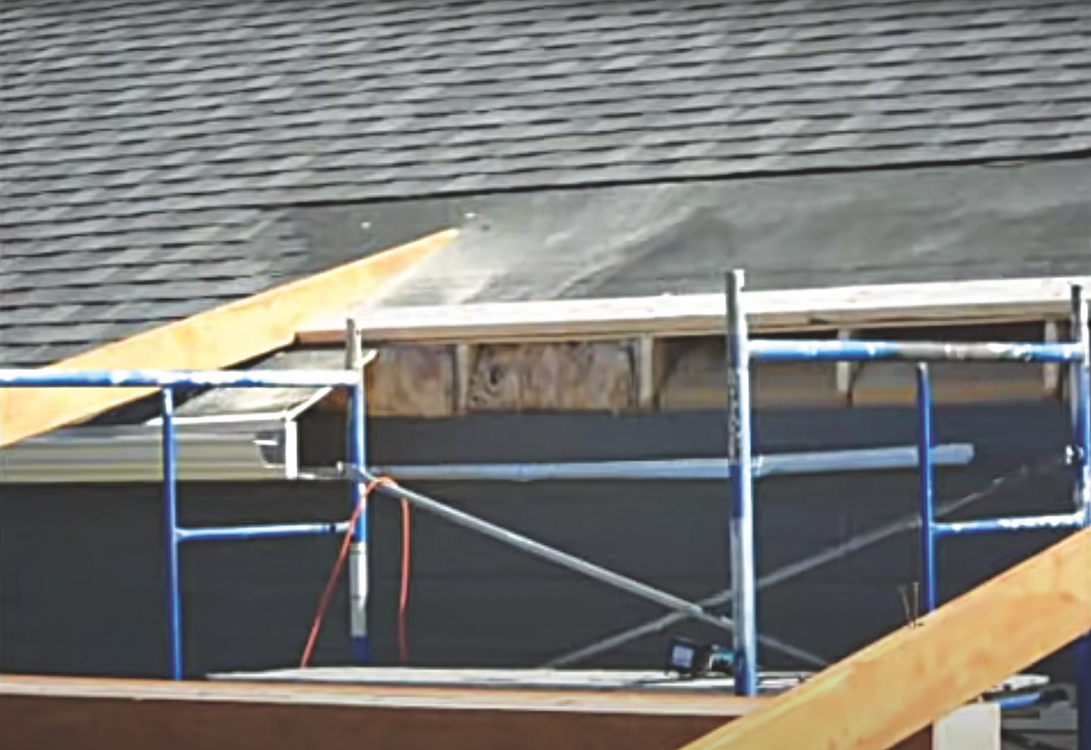
The existing roof—the eave specifically—is obviously the tricky point. The aesthetics are subjective, but Brown and the homeowners agreed on removing it underneath the new roof. That decision necessitated extending the wall plane up to the new 1x6 roof decking, while also closing in the cut-off eave ends in a tidy fashion. [3]
In addition, the home’s existing 6/12 roof uses trusses, so Brown needed to determine if and how he could cut them off. “We were able to contact the original truss manufacturer in order to verify that removing the eave area would not compromise the structural integrity of the existing trusses,” he notes.
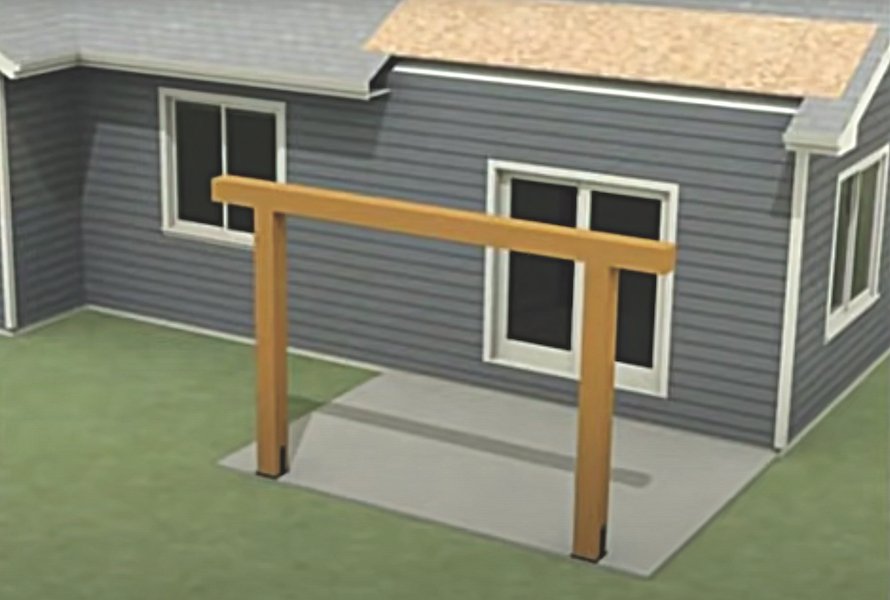
[3] Cutting off the eave flush with the wall plane was an aesthetic choice and required a call to the truss manufacturer.
Materials For a Sturdy, Rough-Hewn Look
At that point, with the design finalized, Brown worked with the Cooks to decide on materials.
“It’s safe to say that this new structure will be the prominent architectural feature on that side of the home,” he notes. “With that in mind, we decided to go with a sturdy rough-hewn look. A typical exterior porch construction would be 4-by or 6-by post and beams. We decided to up the ante and go with 8x8 rough-sawn posts and beams, and 2x6 rough-sawn rafters.”
He also specified rough-sawn 1x6 material for the decking, topped with black roofing felt to block the view of the OSB from below, then the ⅝” OSB, and then matching asphalt shingles.Finally, as both a decorative touch and structural requirement, Brown specified custom chunky black steel pieces for the post-beam connectors and for the post bases/brackets.
Step-By-Step Installation
The construction process began with using a power plane to chamfer the edges of all the new rough-sawn lumber. “This extra step will add a simple but elegant touch to the overall finished product,” Brown explains.

[4] Post bases were custom fabricated for the 8x8” posts.
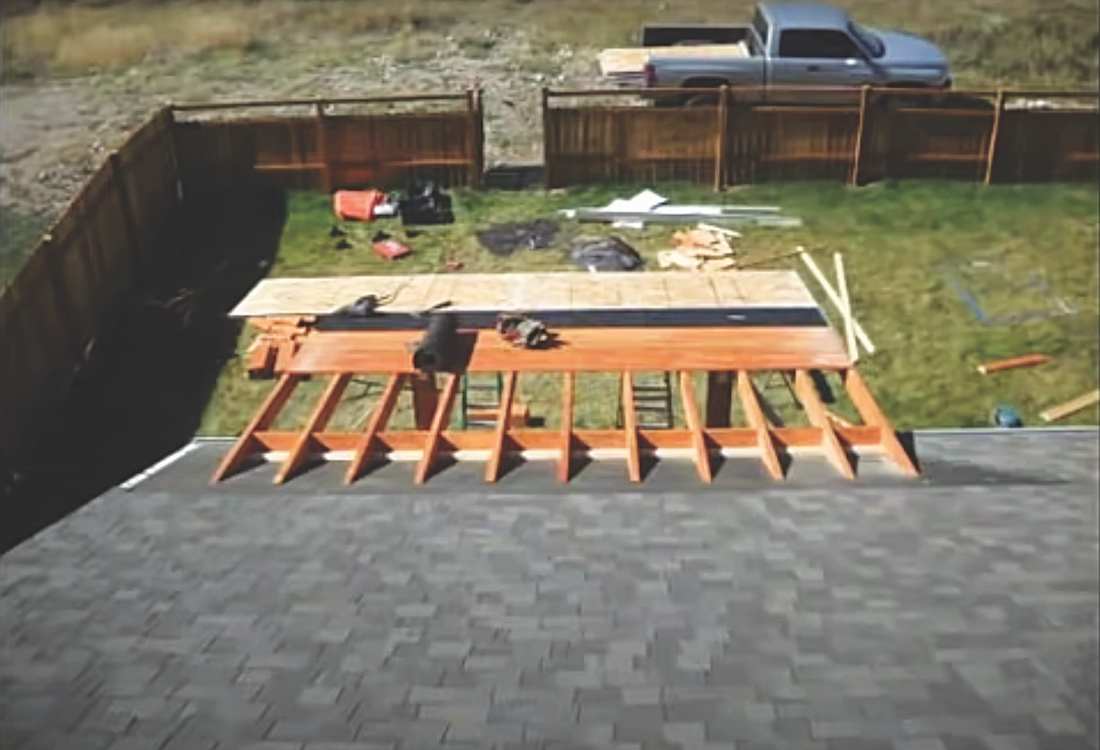
Following that is laying out all the 1x6 decking, 2x6 rafters, and 8x8 posts and beam for pre-staining with a nice-looking medium-brown stain.
The post brackets Brown specified are next up for layout and installation. “The use of 8x8 posts and beam required that we weld our own custom brackets and connectors,” he explains. “The two brackets to connect the post to the patio slab consist of 8-inch plate with vertical fins. These plates are attached to the slab with two 5/8x6” concrete anchors. Each vertical post is cut to length, secured to the brackets with lag bolts, and braced into a plumb position,” Brown notes. [4]
[5] The beam’s 15° chamfer provides the bearing surface for the rafters.
With the posts in place, the horizontal beam gets a 15° chamfer at the bearing point for the rafters. Then it’s hoisted into place and temporarily secured to the posts. [5]
Now that the beam in place, the two outside rafters are placed and squared into position. [6]
[6] The two outside rafters are squared into place to provide reference for the rest of the roof, including where to start cutting.
With the rafters in place, the crew can see exactly how much of the shingles, decking, and eave to remove, in addition to where the new components will be attached. [7]
[7] Cutting off the trusses required a call to the truss manufacturer for instructions.
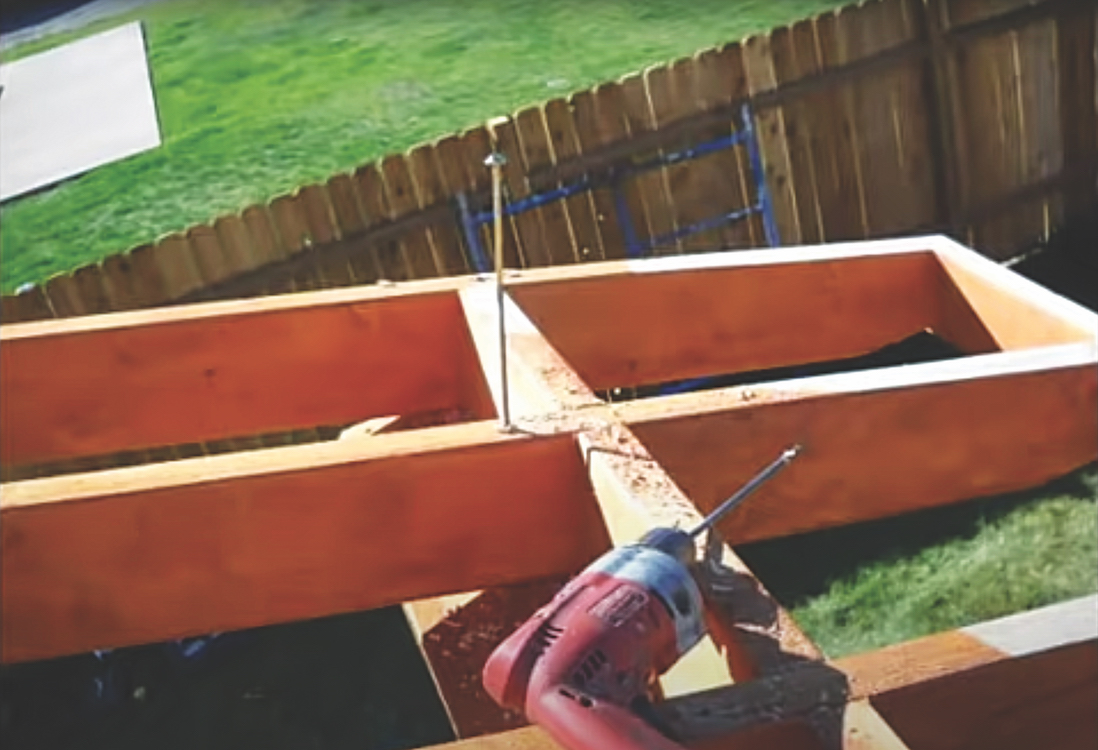
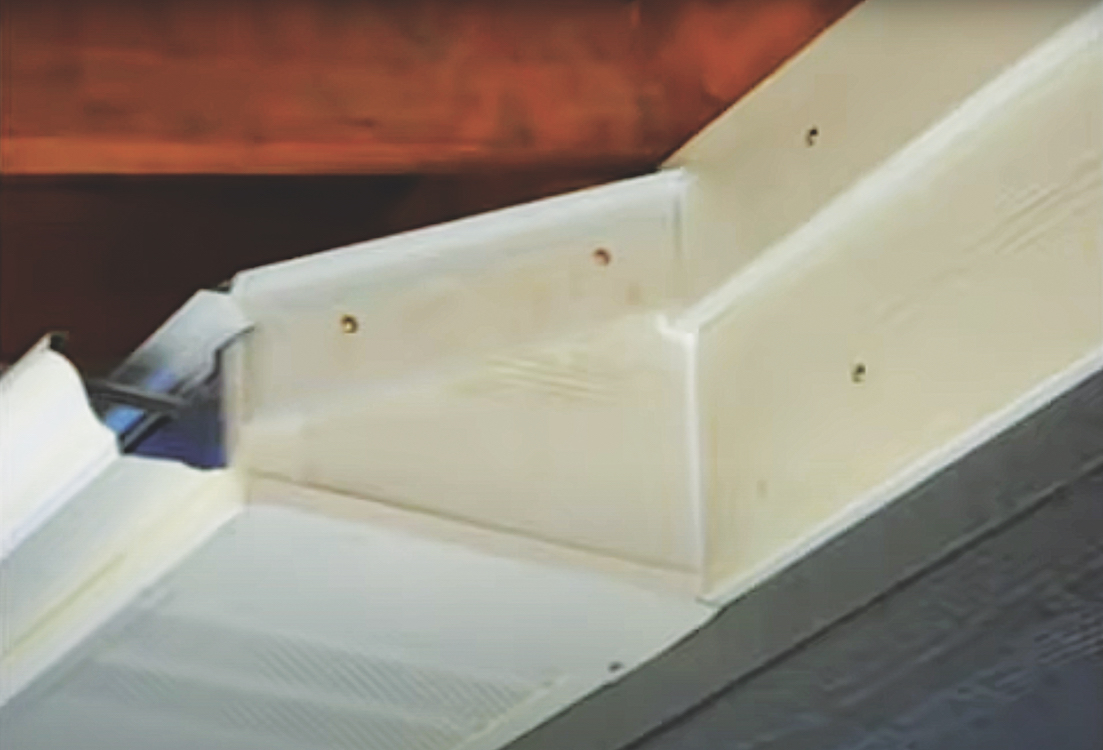
“Once the eave is trimmed back and the exact bearing point location for the rafters is determined, a continuous 2x6 is attached across the existing roof surface,” Brown explains. [8]
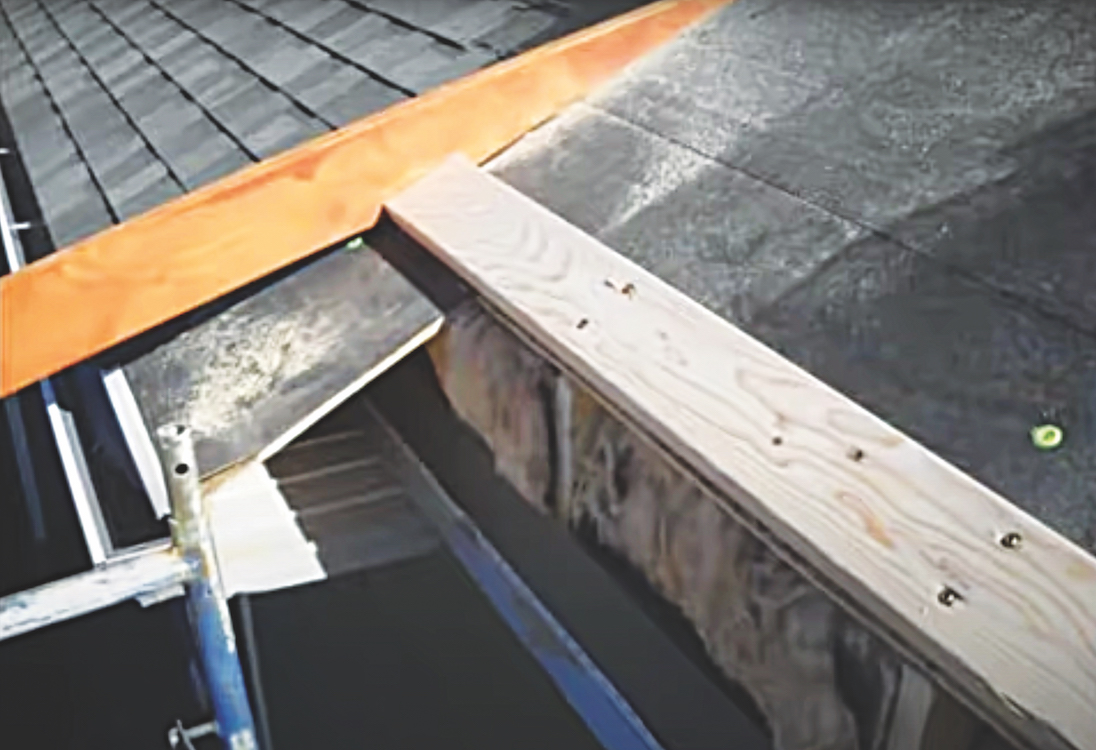
[8] The new 2x6 provides a bearing surface and attachment point for the new rafters. Note the open eave, which will be closed later.
Each new 2x6 rafter is precut, seated on a 14-inch layout over the 2x6, and attached with an 8-inch structural screw. Blocking is attached to the low side of the 2x6, leaving a small gap at the top for ventilation. [9] It will get screened later. The blocking gives the wall below a clean termination point, as shown in the diagram. [10]
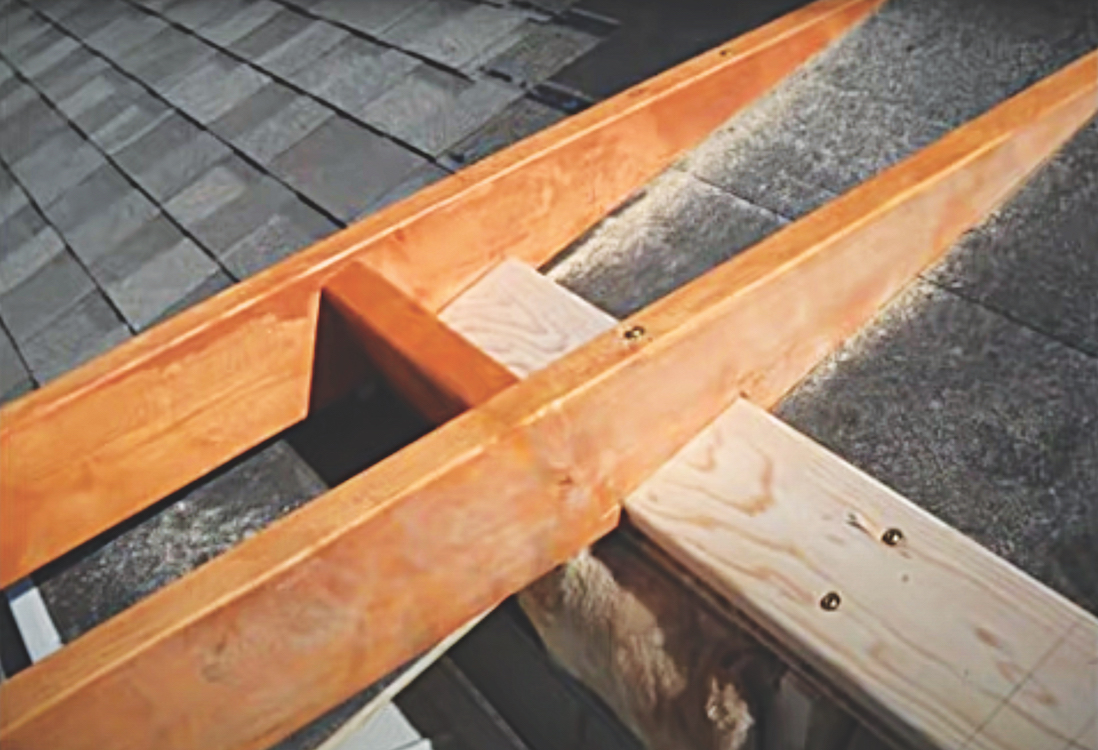
[9] The rafters are installed on 14” centers, not on the 24” truss spacing.
[10] The blocking is set to provide a clean termination for the wall below, as well as a gap at the top for ventilation.
Down at the eave end of the new patio roof, the rafters bear on the chamfered area of the beam. They attach through the top of each rafter with a 10-inch structural screw. Blocking between the rafters provides a more finished appearance. [11]
[11] A 10” structural screw secures each rafter at the chamfered surface. Blocking makes for a tidy look.
Atop the rough-sawn rafters, the pre–stained, rough-sawn 1x6 is attached with ¼” spacing. [12] Next up is the roofing felt, then ⅝” OSB, and asphalt shingles to match the existing shingles on the house. [13]
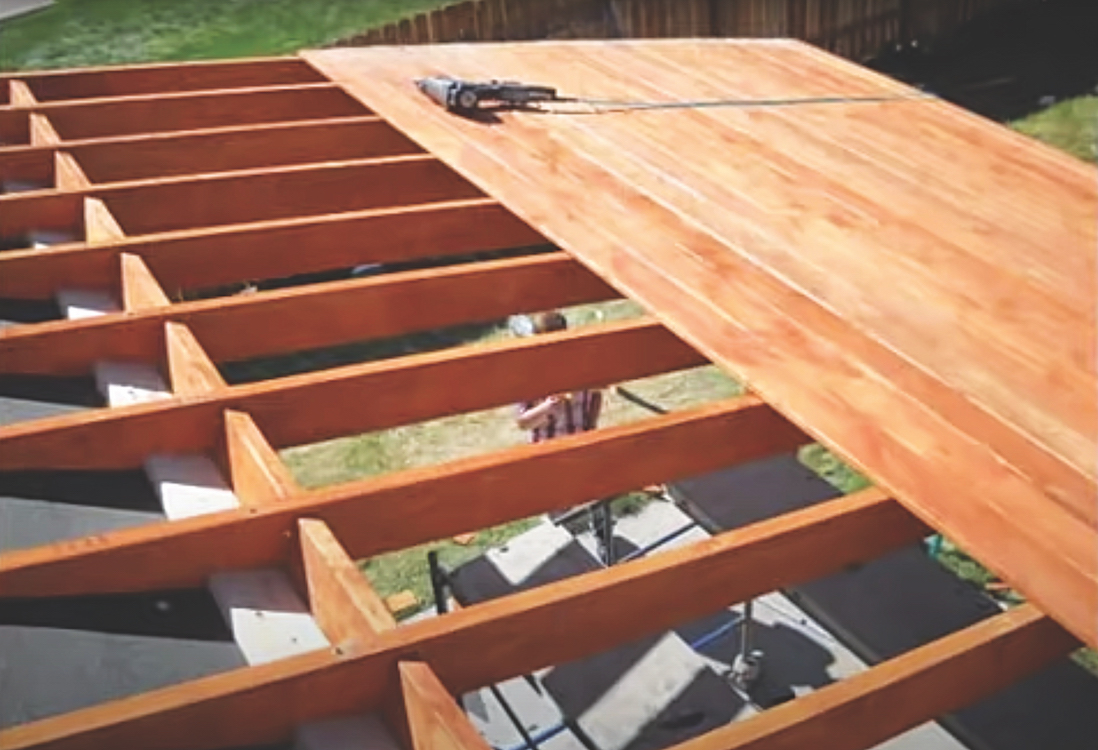
[12] Like the rough-sawn rafters, the rough-sawn 1x6 decking is visible from below.
As mentioned earlier, the upper part of the new roof has an area that could be an enclosed, unventilated dead space between the rafters. “Unventilated roof spaces can be trouble. So as a precaution, we have set the blocking low and installed 1/8 inch screening,” Brown notes.
[13] The OSB isn’t needed for strength, but ensures that shingle nails don’t show through the finished surface below.
Much like the decision to cut off the eave, how to finish off the cut ends is a mostly aesthetic decision. As Brown explains, “An area of concern during the design process was how to finish the areas where we removed the eaves. The eave terminations and wall area are very visible. We experimented with some mock ups and came up with a clean final finishing detail that blends well with the existing eave.” [14]
[14] The new eave terminations are clean and tidy, and are well protected from weather under the new patio roof.
The post-to-beam junction requires a connector, and while it’s possible to buy a variety of different pieces off the rack, custom pieces are fun to design and to make. That’s the approach Brown took for the Cook’s project. It was also a way to match the approach he took with the post brackets.
“One of the last details before roofing the new structure is adding permanent post and beam connections,” he explains. “As an artistic flair we had 3/16” plate sheared into triangle shapes drilled and finished. These simple connection plates add an interesting and functional finished detail.” [15]
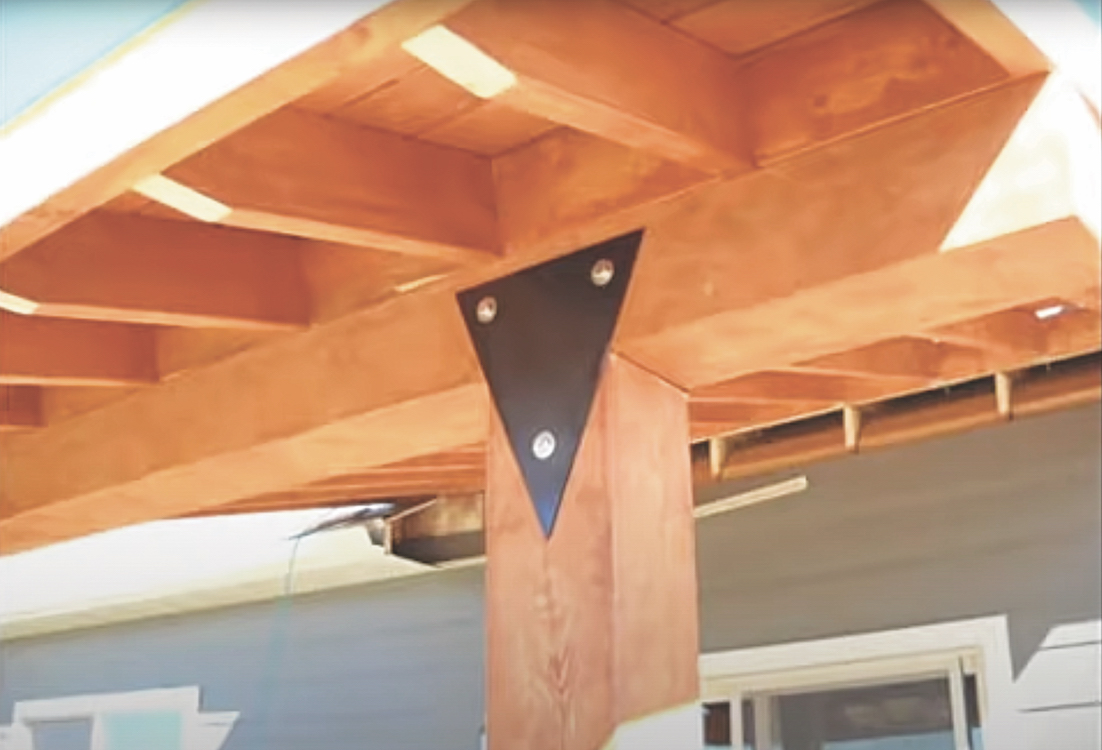
[15] Simple and functional like the heavy rough-sawn lumber, these connection plates are spot on for this patio.
With the patio roof finished, the wisdom of this more-ambitious design is clear. Simply attaching a ledger would have been quick and easy in comparison, but also a bit flat and boring. “Mike and Gina are very pleased with the final product. This covered patio area greatly increases the livability of their backyard,” Brown notes.
Comments